CircleCI webhooks with Airtable

 Cloud
Cloud This document describes how you might use webhooks with a third party application - in this case, we are using Airtable to demonstrate how one could capture and visualize the output of your pipelines.
Prerequisites
- An account with CircleCI.
- A familiarity with webhooks on CircleCI.
- An Airtable account, if you wish to follow along.
Get setup in Airtable
1. Create a new “Base” on Airtable
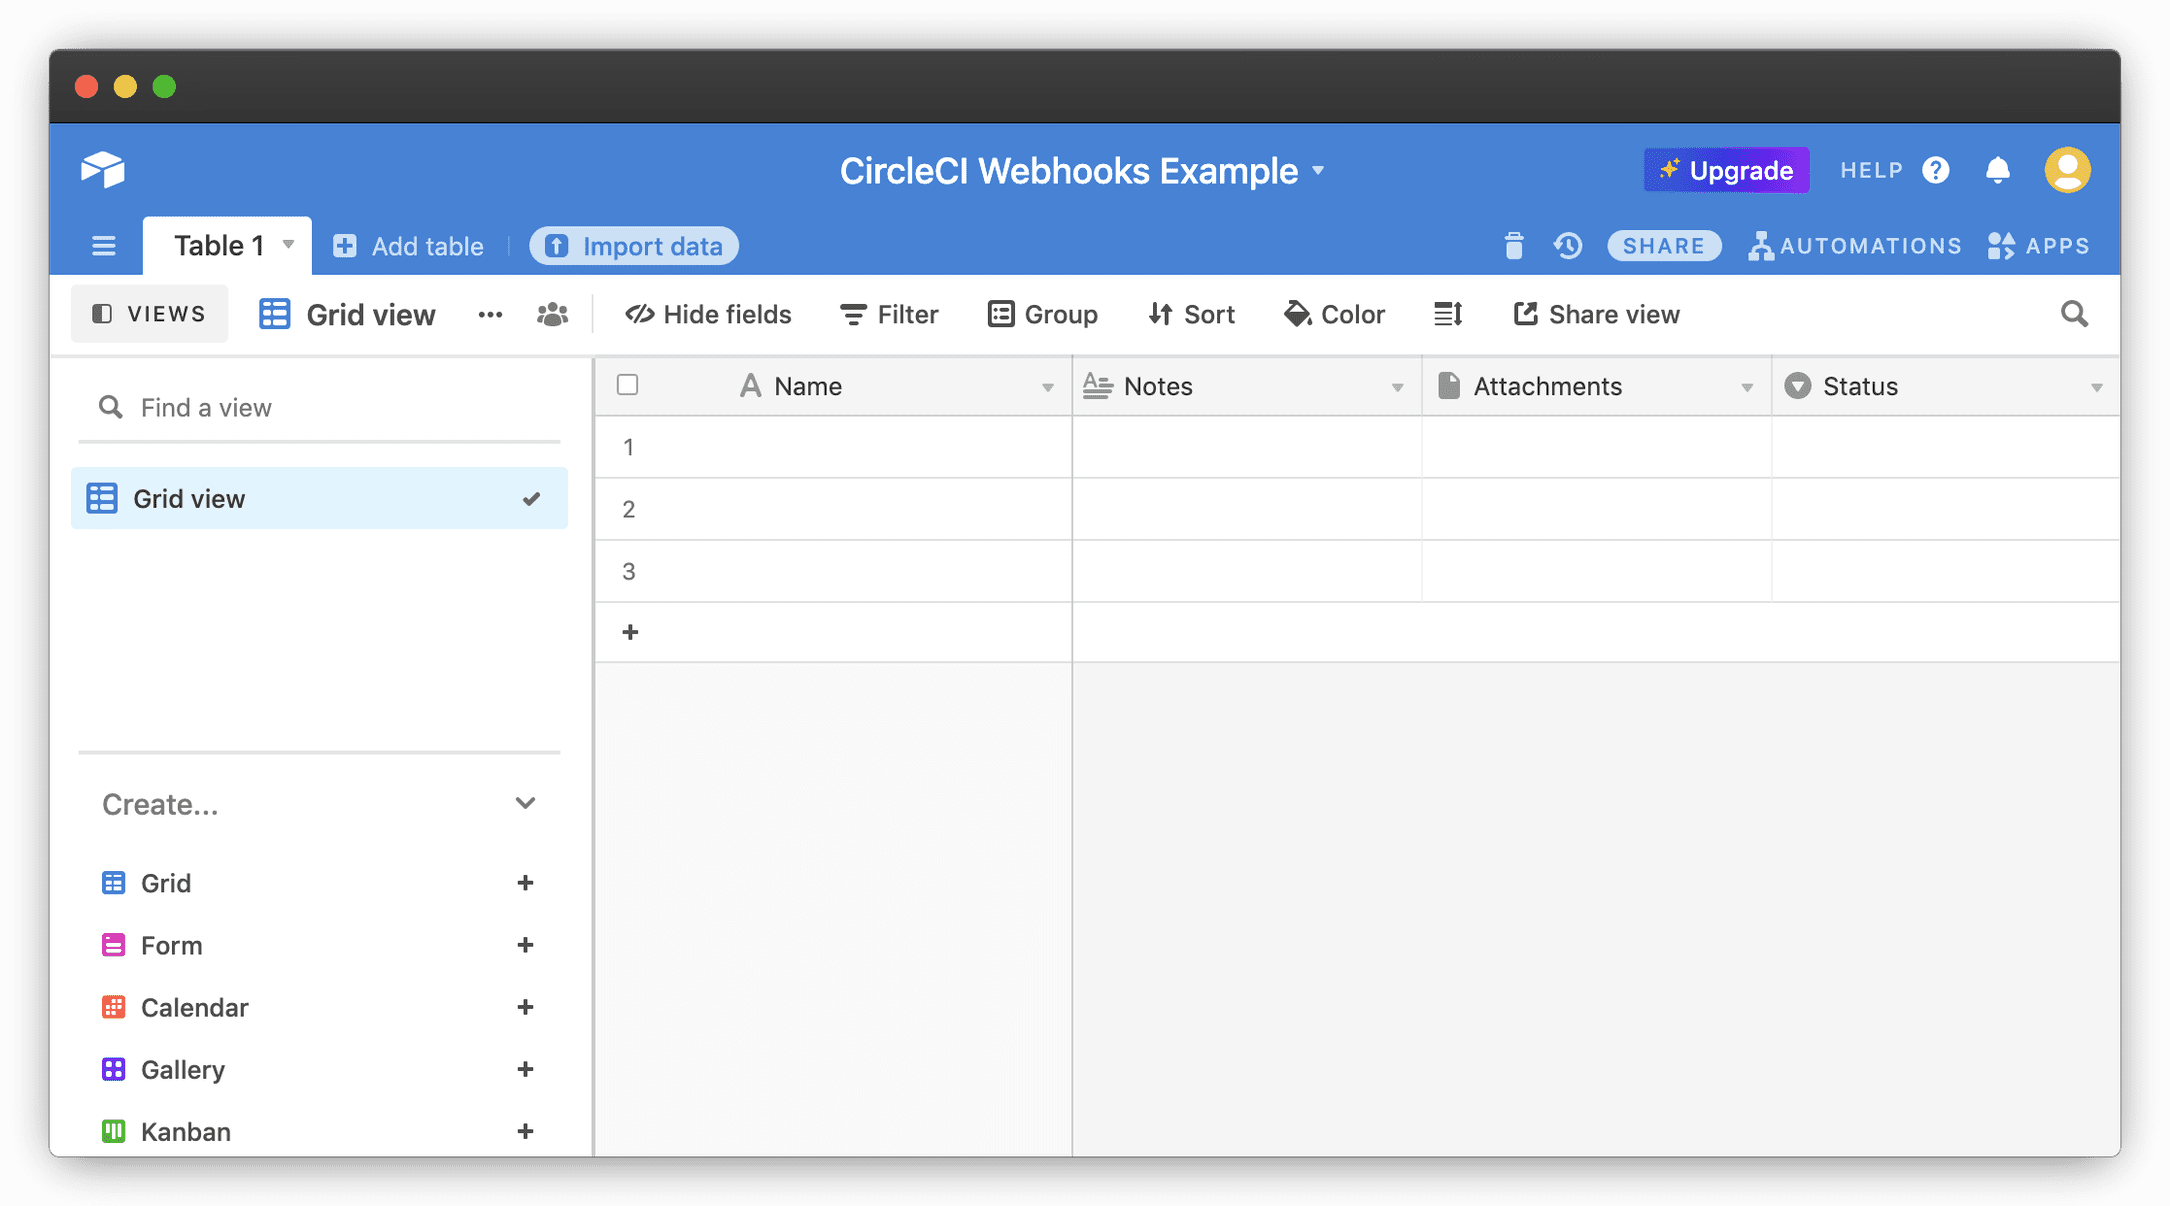
Log into Airtable and create a new “Base”.
2. Set table and column data types
By default, your new “Grid view” will be named “Table 1” and will show several pre-defined columns, each with a different data type. We will replace these columns with what data we want to receive from CircleCI about our Project.
Most of our data will simply be “A single text line”, but some values can use types like “date”. For our example, remove the existing columns and enter the following three columns as “A single text line”.
- ID
- Job Name
- Status
Finally, add one last column, but this time use the “date” data type:
- Happened At

3. Prepare the webhook Automation
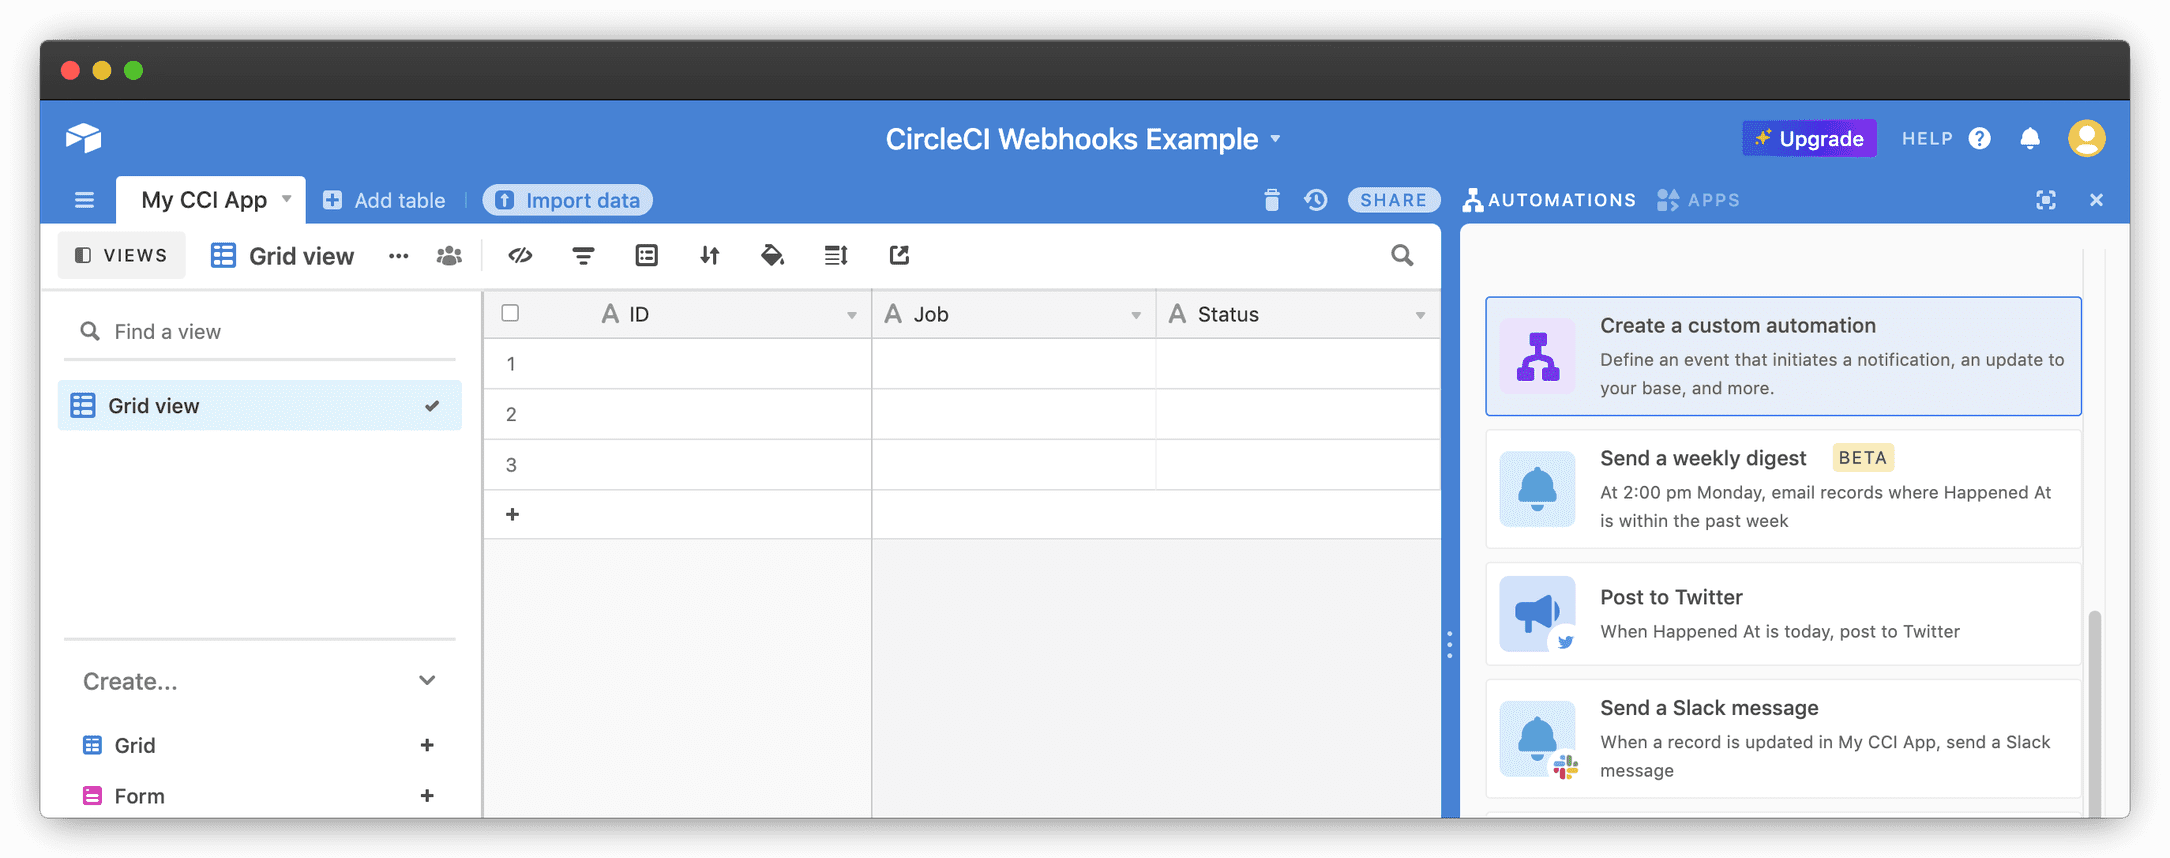
In the top-right of Airtable, select the “Automations” button to open the right-side Automations panel, and select “Create a custom automation”.
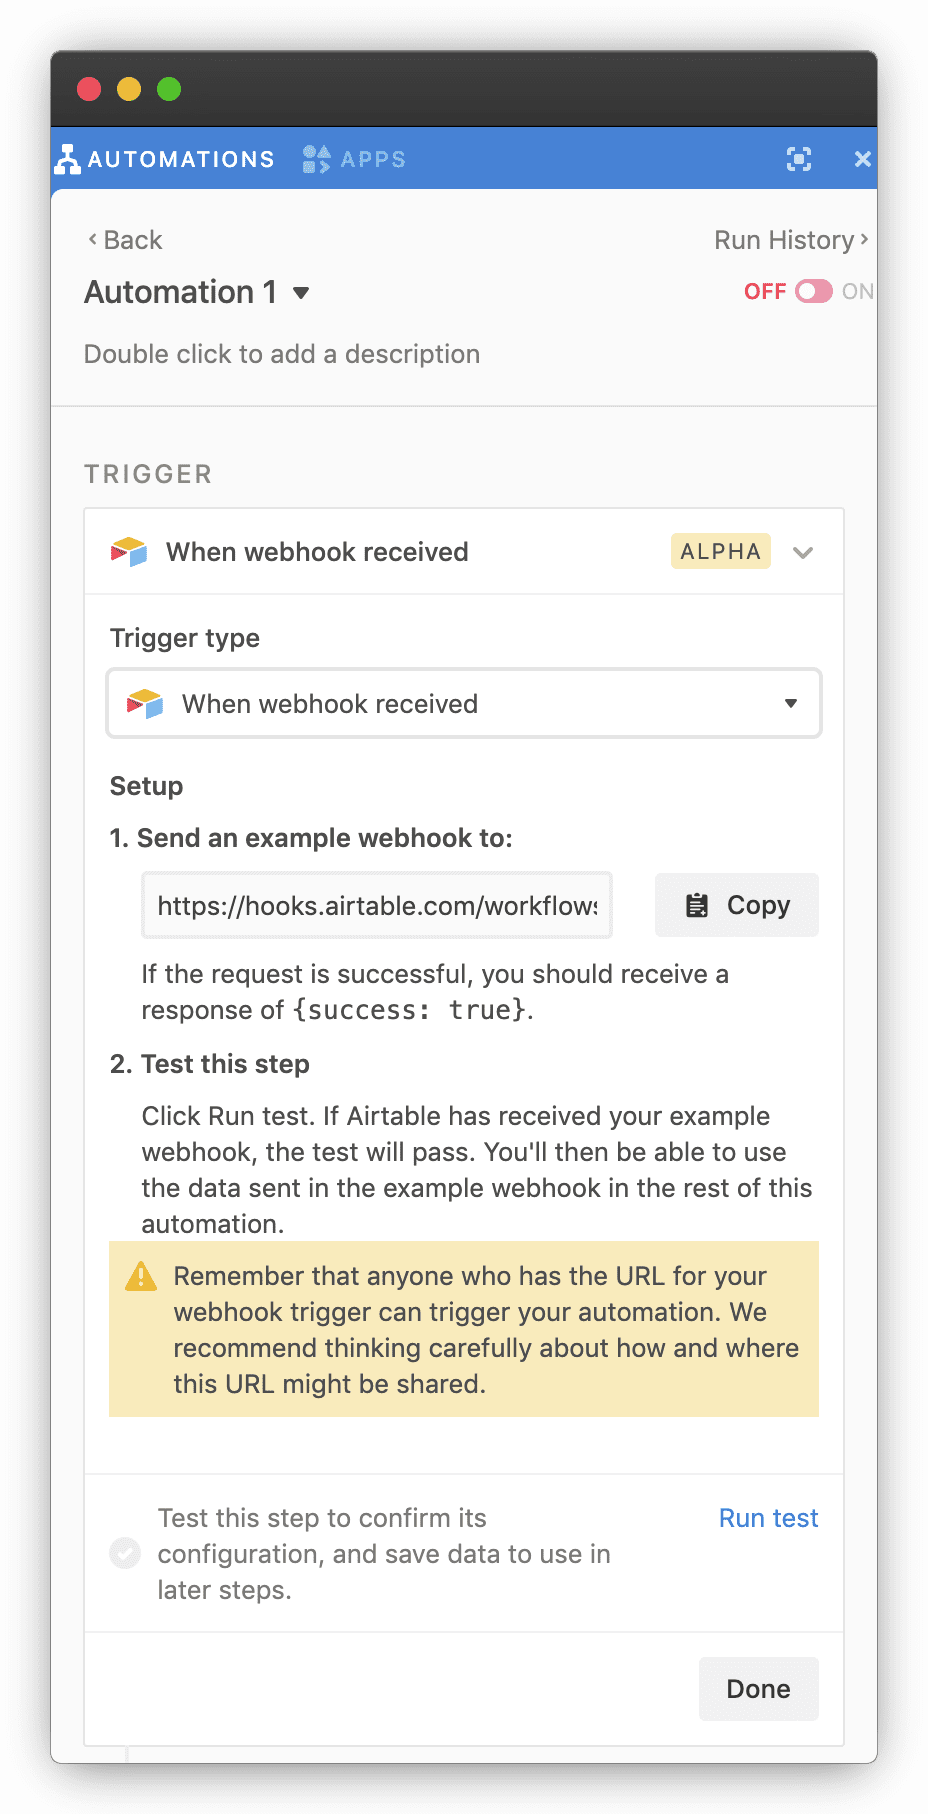
The next screen will ask you to select a “trigger” to the automation. Select the option “When webhook received”, and you will see the following screen which contains our Airtable webhook URL.
Copy the webhook URL here to your clipboard.
4. Connect to CircleCI
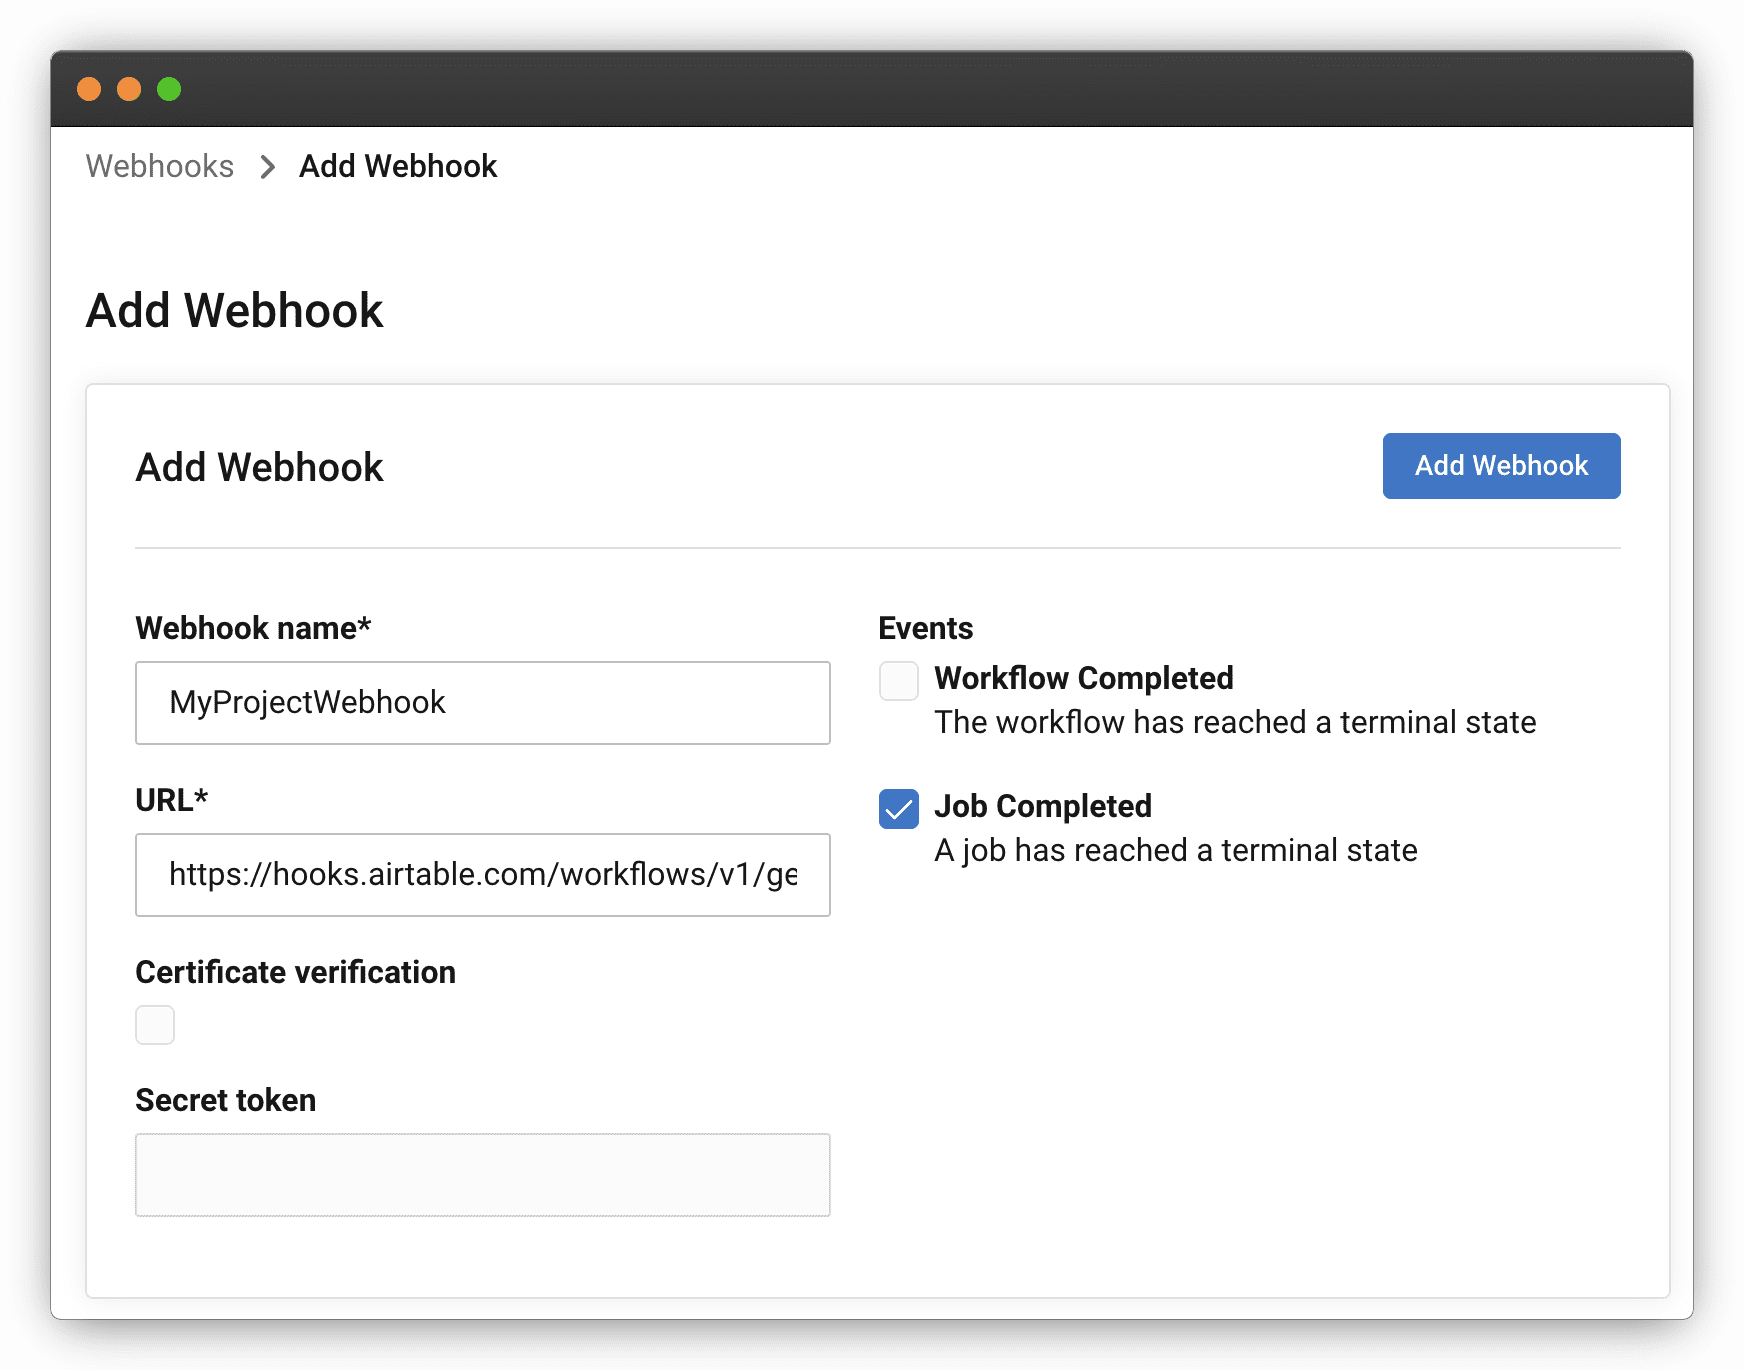
With our webhook URL from Airtable in hand, we can now setup our webhooks for CircleCI. Begin by opening up the project settings for the repository you want to monitor on CircleCI, and select “Webhooks” from the side panel.

Click “Add Webhook” and enter a name for the webhook, the webhook URL we copied earlier, and select the “Job Completed” event, before saving by pressing “Add Webhook” again.
5. Trigger a test webhook
Now that our webhooks are configured, we want to trigger a CircleCI pipeline before going back to Airtable so that Airtable can see what kind of data we will be sending. View your project’s pipeline on CircleCI on any branch we can use for testing and click the “Run Pipeline” button:
Once the pipeline has completed the first test webhook should have been sent and we can validate this in Airtable. At the bottom of the webhook trigger config screen, press the “test” button and await for the webhook data to populate.
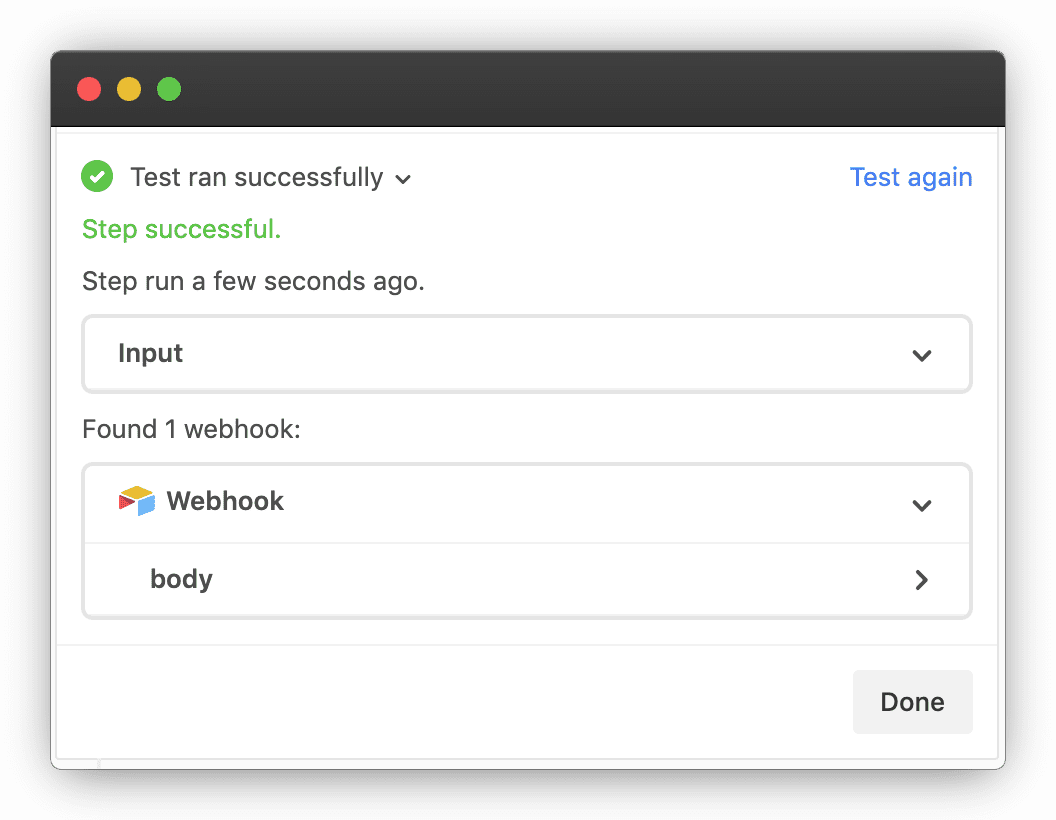
When you have received the data successfully, you may click “Done” and move on to creating an Action for the Trigger.
6. Setup the Action for our webhook Trigger
For the Action Type, select from the drop-down “Create record”, and select your Table.
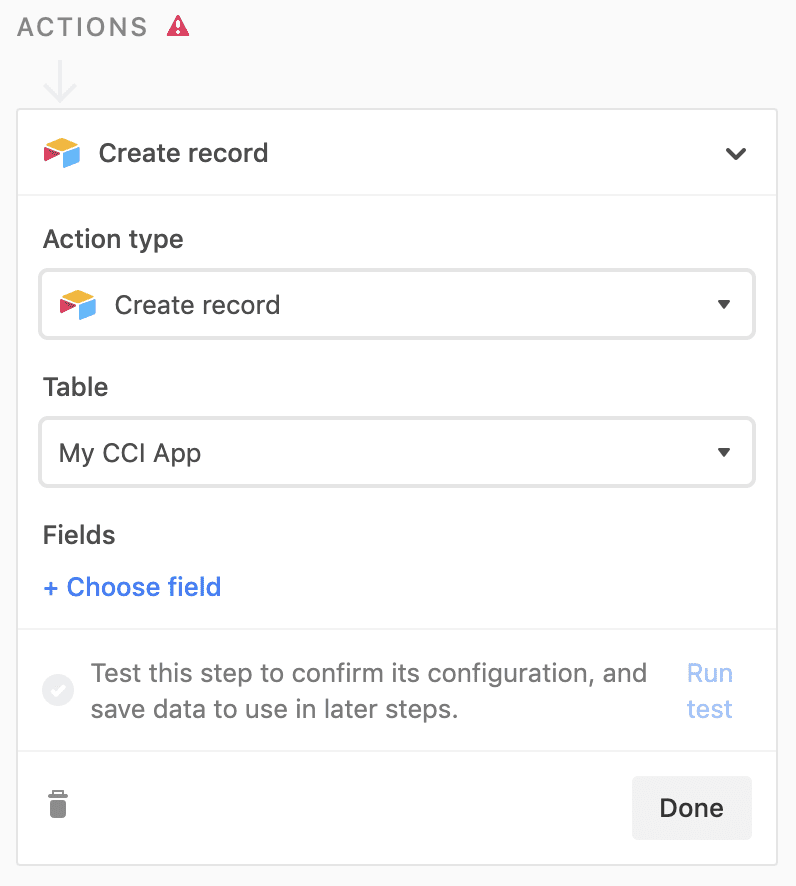
Next, click “Choose field” and map each column of our table to the corresponding webhook data.
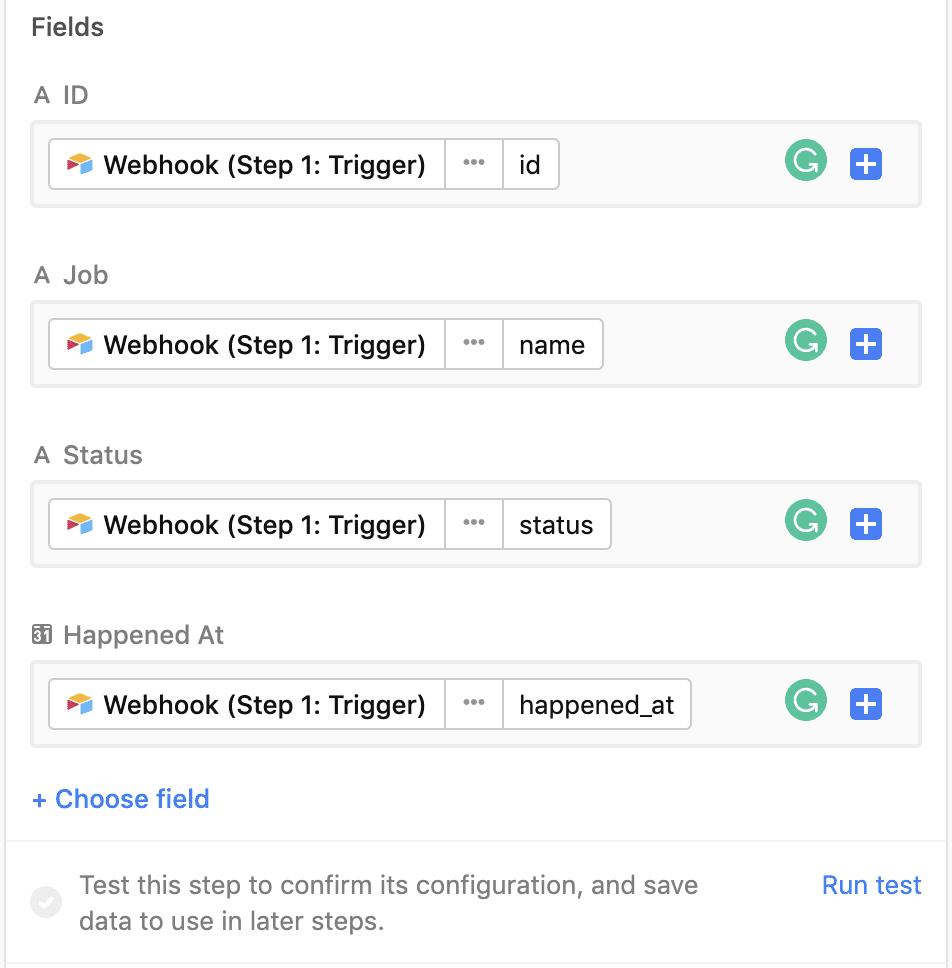
Finally, click “Run test” to populate your first row.

- Done! Now, as jobs complete for your pipeline new data will be entered into Airtable. Airtable has both free and premium features for creating different views of your data. Your data can be cross-referenced with other tables, used in calculations, and more.
Tracking Deployments With Airtable
While the above covers some basics with Airtable, let’s take things a step further and look at how we might further leverage the collected data. Once you have a sufficient amount of data, we can start to create helpful views of our data. How about a calendar view of our deployments to help us visualize how often we are deploying!
In Airtable, go to the bottom left of the “views” side panel and click the “plus” icon on “Calendar”.
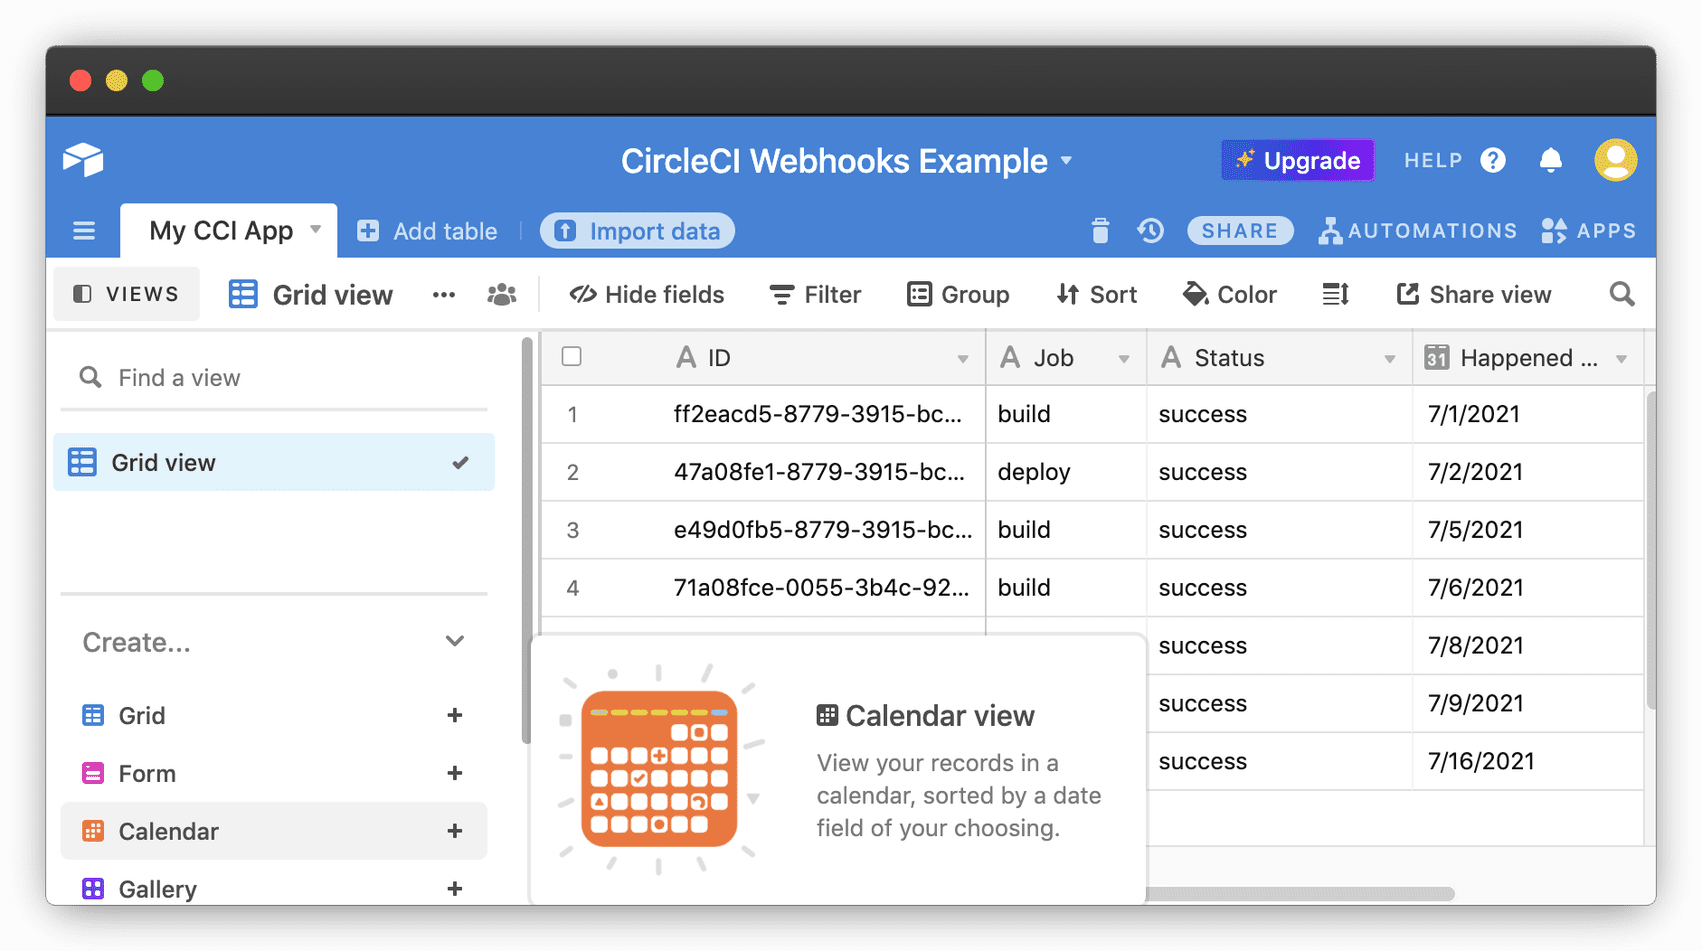
The next screen will ask you to confirm which “Date” column we want to base our calendar on, and since we only have one “Happened at”, we will select that.
You will be presented with a calendar view of all of your jobs. Because we want to track just our deployments, let’s rename this view “Deployments” and set a filter at the top to only show jobs with the name of our deployment job on CircleCI, which in our case is “deploy”.
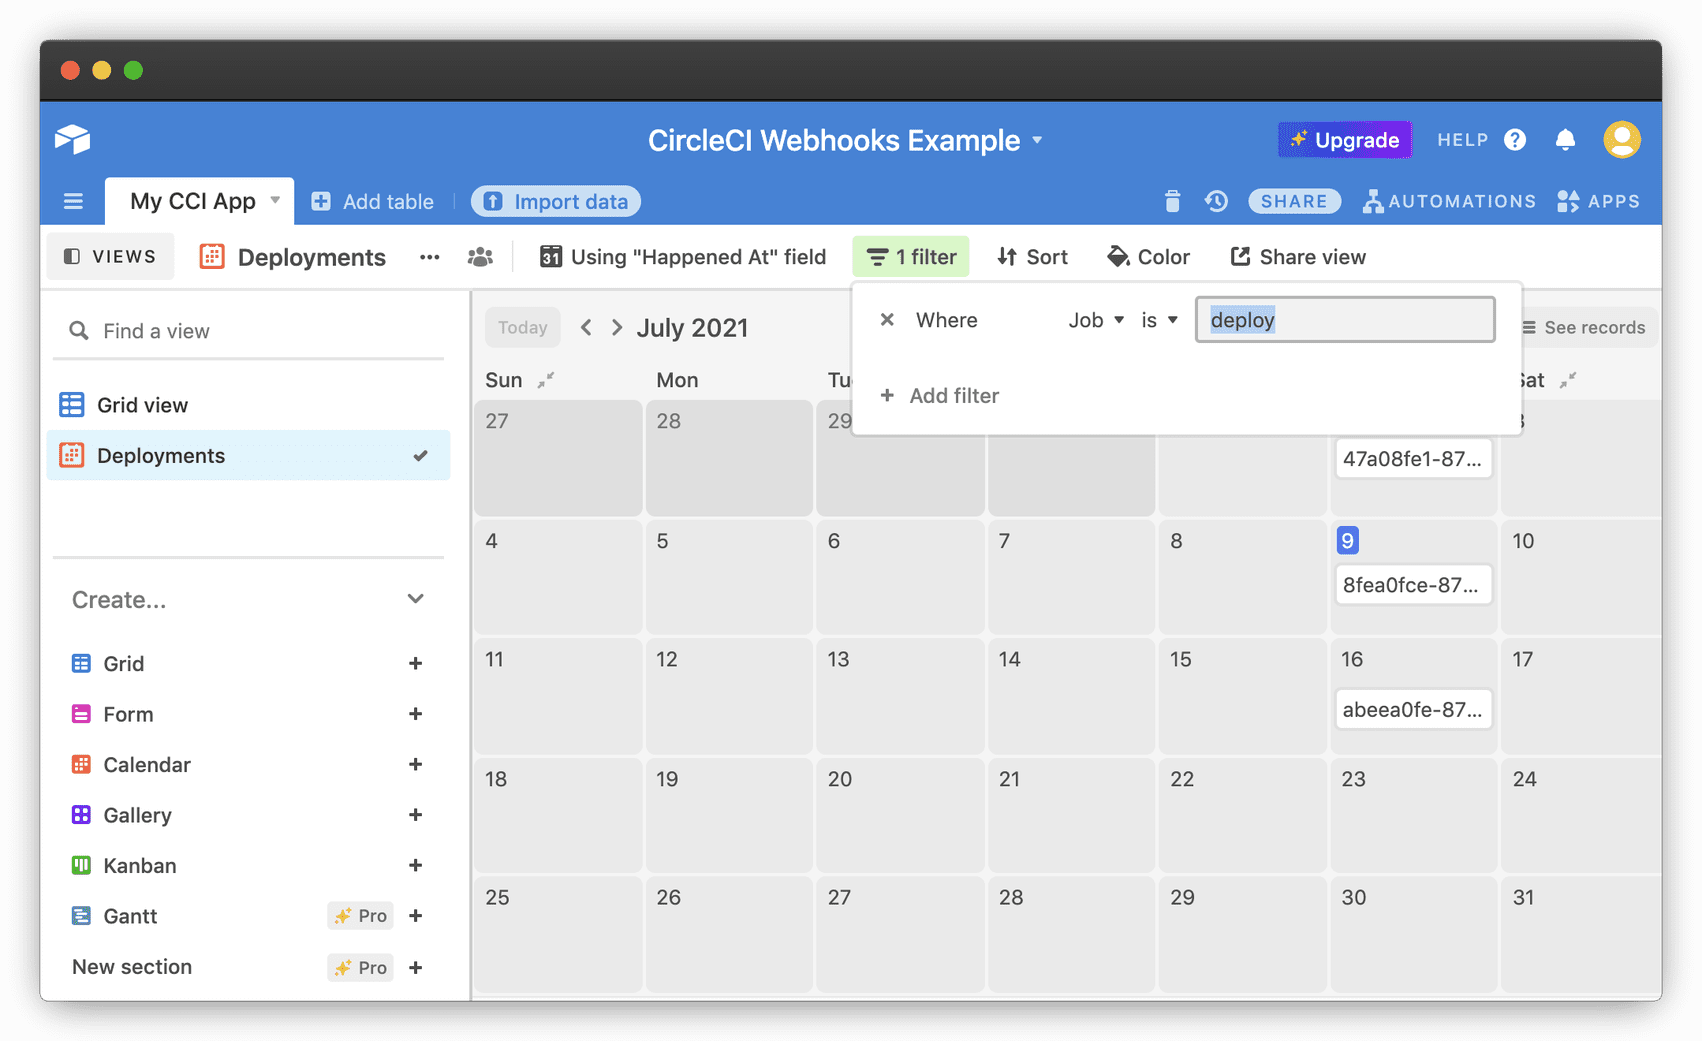
And that’s it! We now have a grid view which contains a spreadsheet of all of our data, and a calendar-based view named “Deployments” which shows us only our deploy jobs.
Help make this document better
This guide, as well as the rest of our docs, are open source and available on GitHub. We welcome your contributions.
- Suggest an edit to this page (please read the contributing guide first).
- To report a problem in the documentation, or to submit feedback and comments, please open an issue on GitHub.
- CircleCI is always seeking ways to improve your experience with our platform. If you would like to share feedback, please join our research community.
Need support?
Our support engineers are available to help with service issues, billing, or account related questions, and can help troubleshoot build configurations. Contact our support engineers by opening a ticket.
You can also visit our support site to find support articles, community forums, and training resources.

CircleCI Documentation by CircleCI is licensed under a Creative Commons Attribution-NonCommercial-ShareAlike 4.0 International License.


