Installing Self-Hosted Runners with the Web App

 Cloud
Cloud This page describes how to install self-hosted runners through the CircleCI web app.
| Installing self-hosted runners is now available directly in the CircleCI web app! You will need to agree to the Runner Terms before this option is available to you in the UI. |
Prerequisites
To install and run jobs, you will need to have root access, and have the following utilities and tools installed on your system:
Self-hosted runner Terms Agreement
Before you can make use of self-hosted runners, you will need to agree to the CircleCI Runner Terms. To be able to gain access to the Self-Hosted Runners section of the CircleCI web app, an admin in your organization needs to navigate to Organization Settings > Self-Hosted Runners, and agree to the terms.

Once the terms have been accepted, Self-Hosted Runners will appear permanently in the side navigation.
CircleCI mirrors VCS permissions for organizations. If you are an admin on your organization’s VCS, you are an admin on CircleCI. If you are unsure, check the admin permissions on your VCS.
CircleCI web app installation
| Currently, the web app installation is available to cloud customers. If you need to install self-hosted runners for server please see the Self-Hosted Runners through the CLI page. |
In order to install self-hosted runners, you will need to create a namespace and resource class token. Please note that to create resource classes and tokens, you need to be an organization admin in the VCS provider. You can read about namespaces and resource classes on the Concepts page.
You can view your runners on the inventory page, by clicking Self-Hosted Runners on the left navigation.
-
On the CircleCI web app, navigate to Self-Hosted Runners.

-
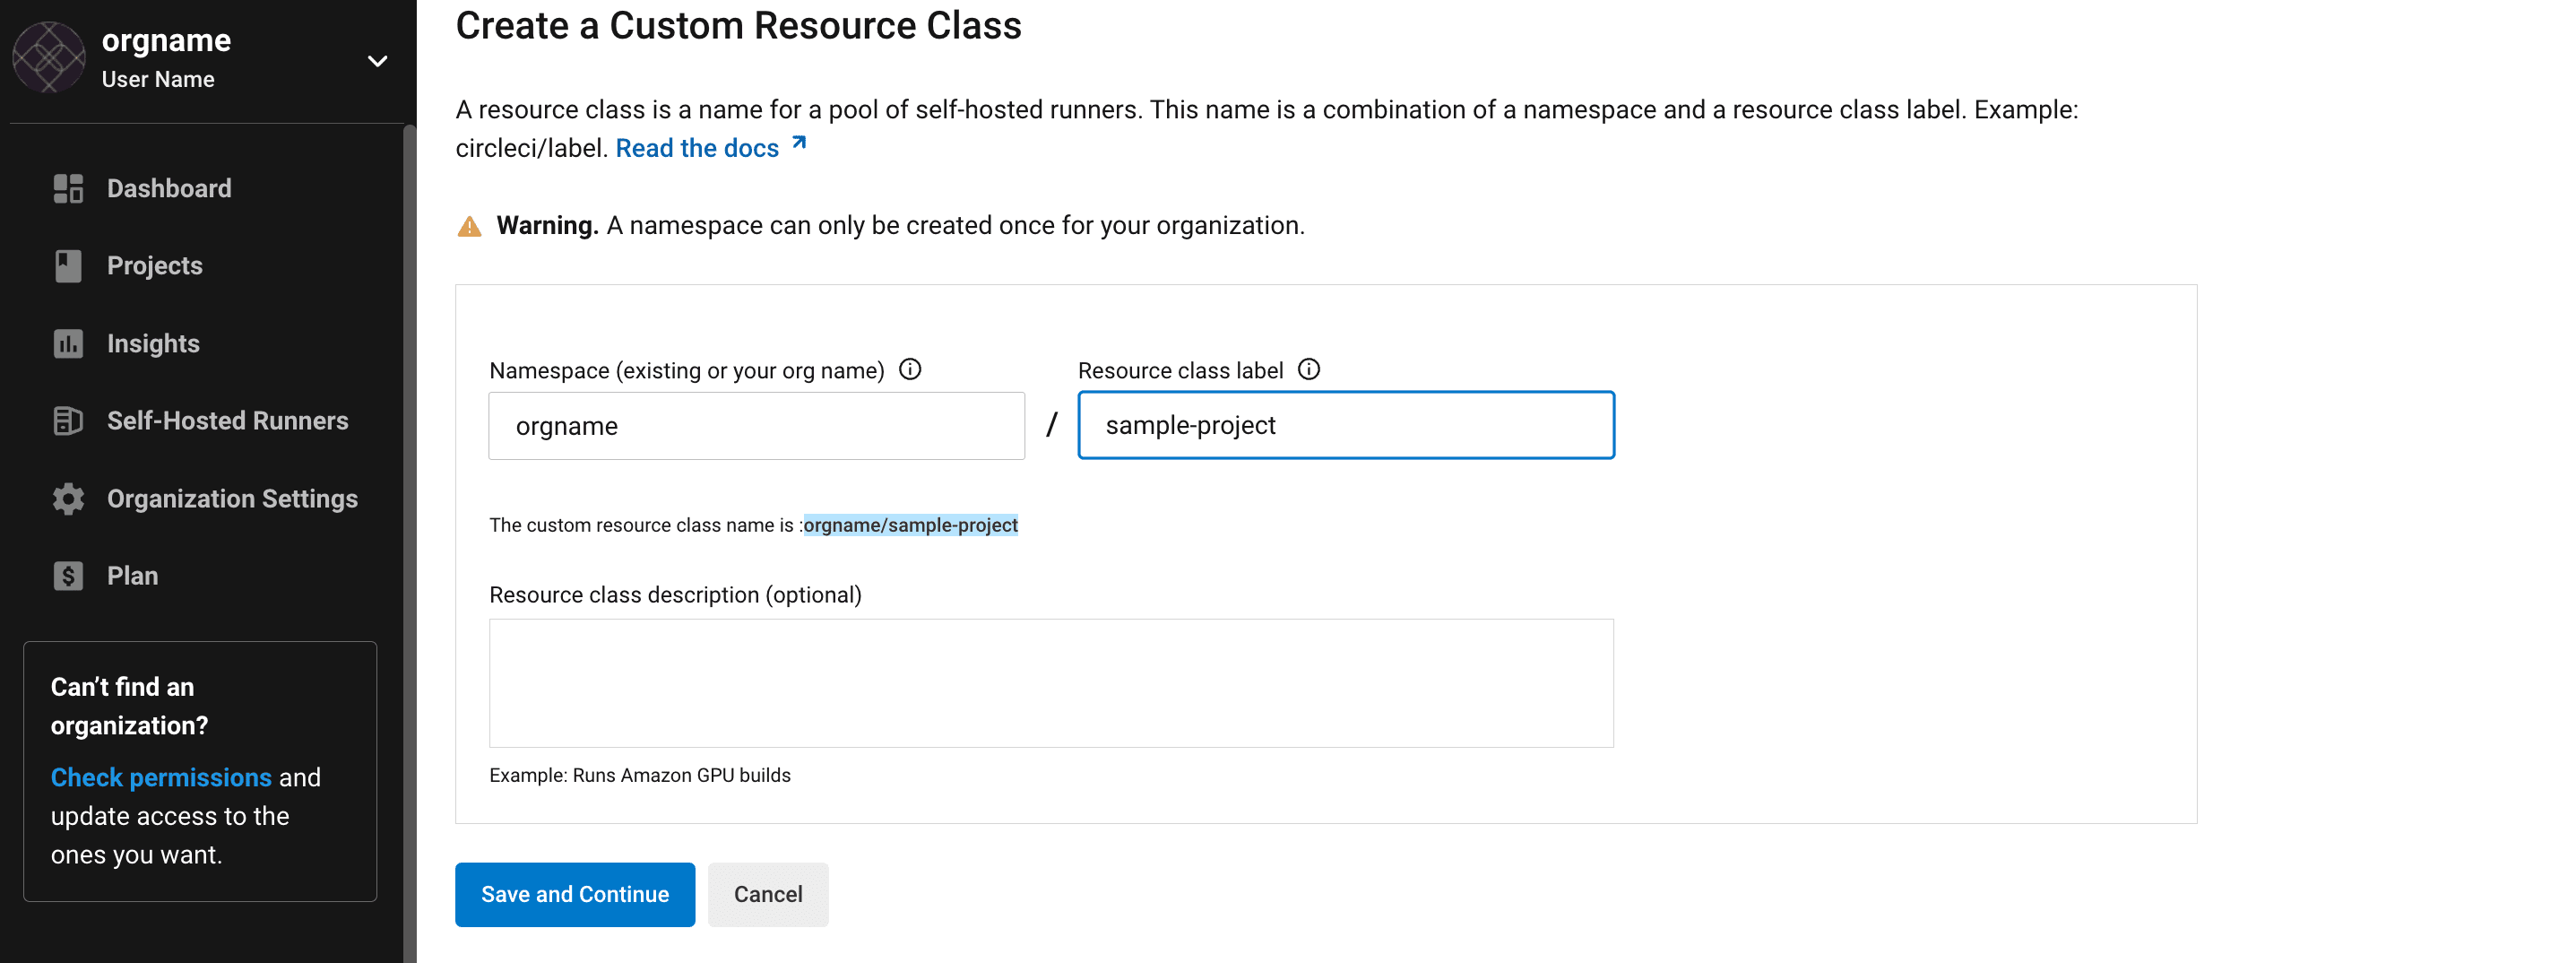
If this is your organization’s first time using self-hosted runners, you’ll need to create a namespace as the first part of this step. Each organization can only create a single namespace. While not required, we suggest using a lowercase representation of your CircleCI account name. CircleCI will populate your org name as the suggested namespace by default in the UI.
-
If your organization already use orbs, do not create a new namespace, enter the namespace your organization uses for orbs.
-
The second input field is to create a name for your resource class for your organization’s self-hosted runners.

-
Copy and save the resource class token. Self-hosted runners use this token to claim work for the associated resource class.

The token cannot be retrieved again, so be sure to store it safely. -
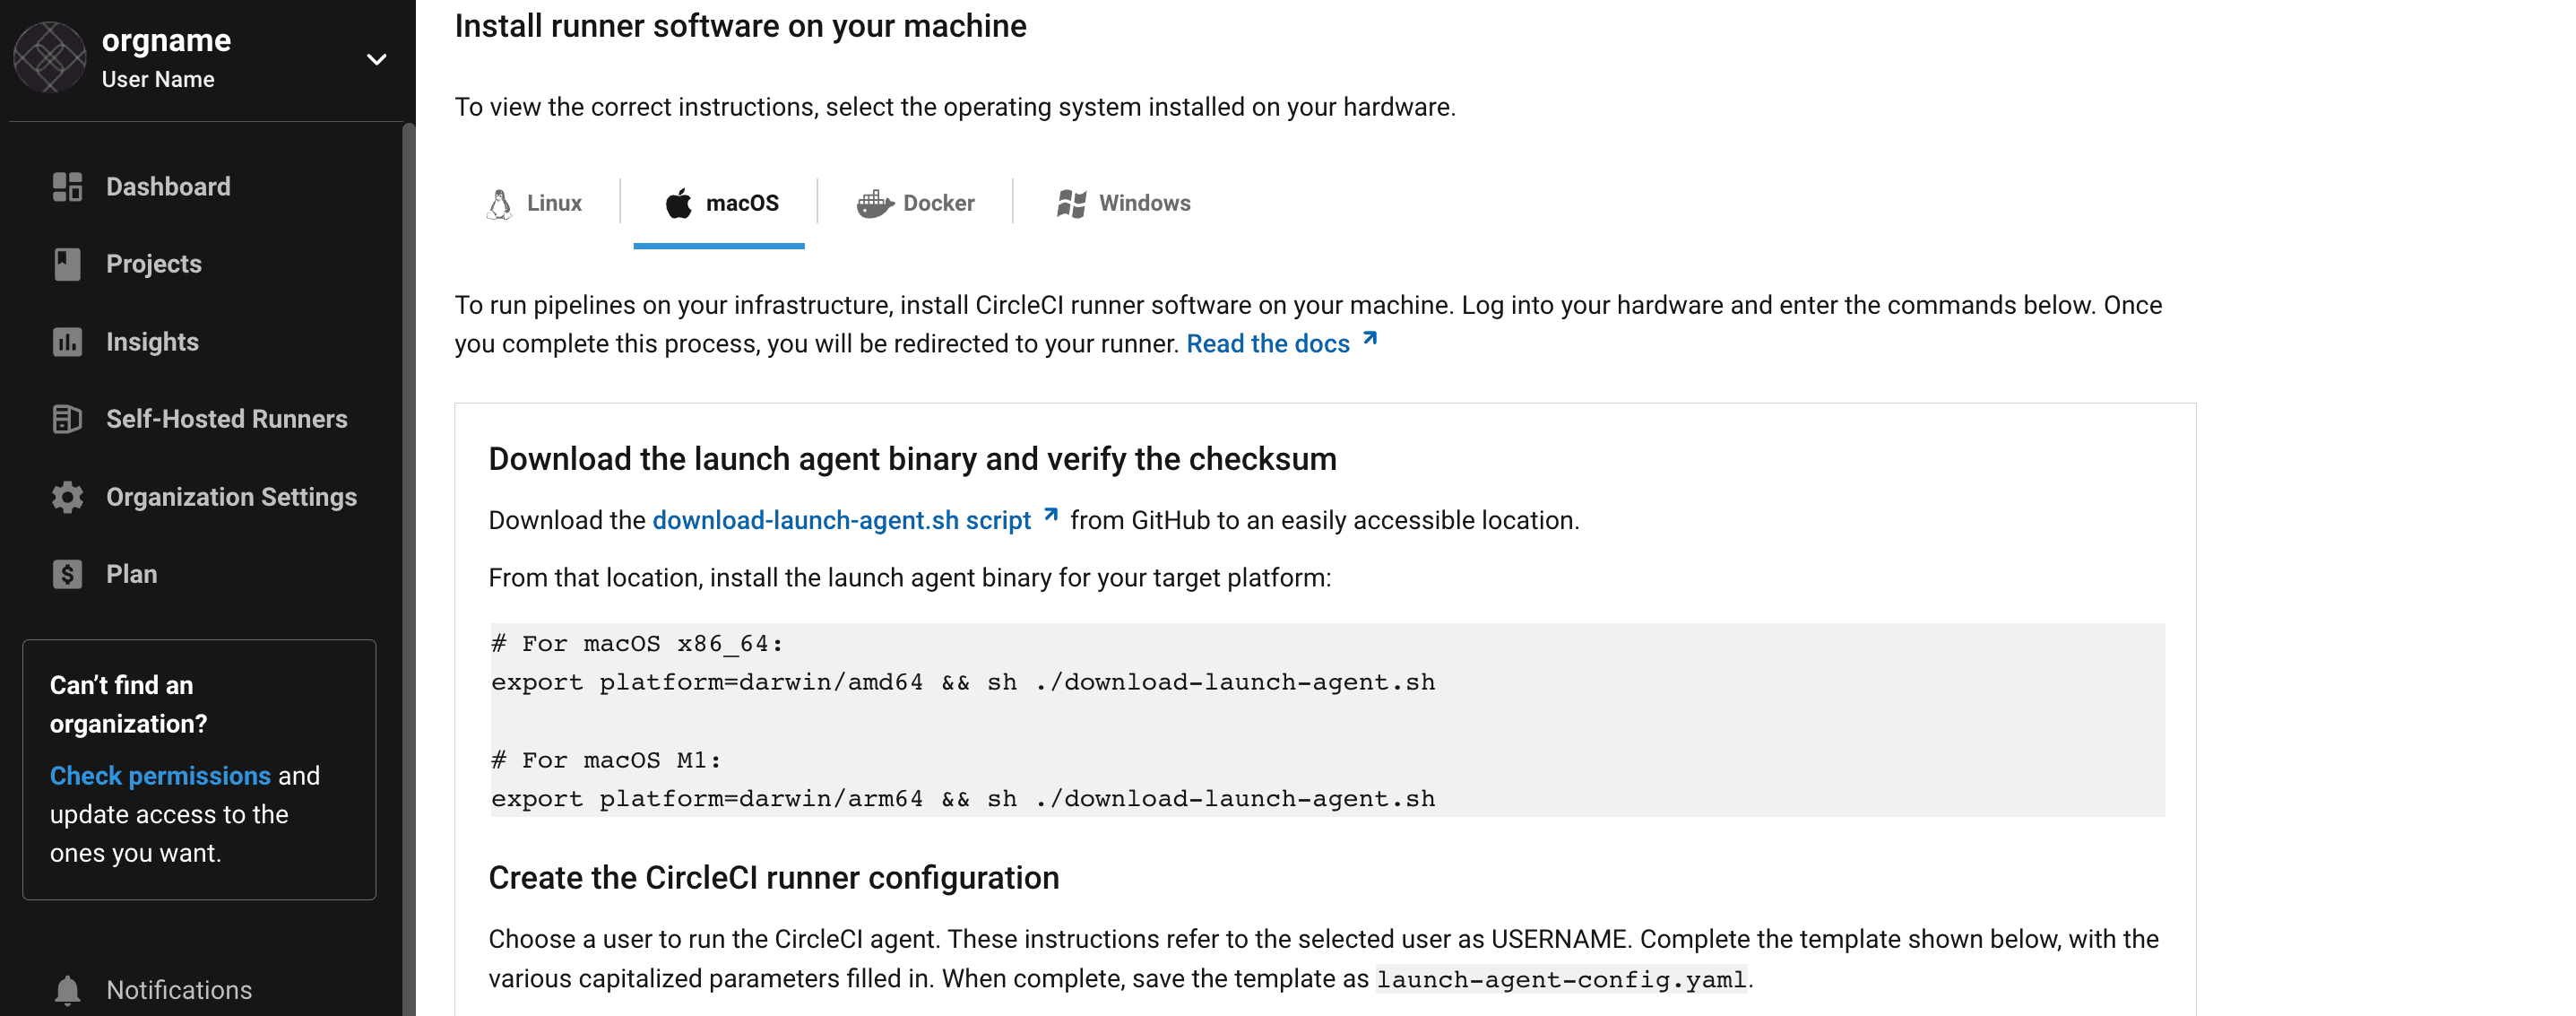
You will need to follow the platform-specific installation instructions to continue. Click the tab in the UI that is relevant to your environment.

The post authentication platform-specific instructions are also documented on their own individual pages if you need to refer to them. See the Platform-specific instructions section for a list of these pages.
Please note that if you would like to use self-hosted runners on Kubernetes, the instructions are not included in the UI, and you will need to refer to the Kubernetes page.
-
You will be presented with configuration code for your new resource class. If you have an existing
.circleci/config.ymlfile, add your new resource class below the existingjobssection, or add the wholejobssection if one doesn’t exist in your config. If you don’t have an existing.circleci/config.ymlfile, you can create the file and copy all of the code over.
Additional resources
Help make this document better
This guide, as well as the rest of our docs, are open source and available on GitHub. We welcome your contributions.
- Suggest an edit to this page (please read the contributing guide first).
- To report a problem in the documentation, or to submit feedback and comments, please open an issue on GitHub.
- CircleCI is always seeking ways to improve your experience with our platform. If you would like to share feedback, please join our research community.
Need support?
Our support engineers are available to help with service issues, billing, or account related questions, and can help troubleshoot build configurations. Contact our support engineers by opening a ticket.
You can also visit our support site to find support articles, community forums, and training resources.

CircleCI Documentation by CircleCI is licensed under a Creative Commons Attribution-NonCommercial-ShareAlike 4.0 International License.


