CircleCI Server v3.x Installation Phase 4

 Server v3.x Server Admin
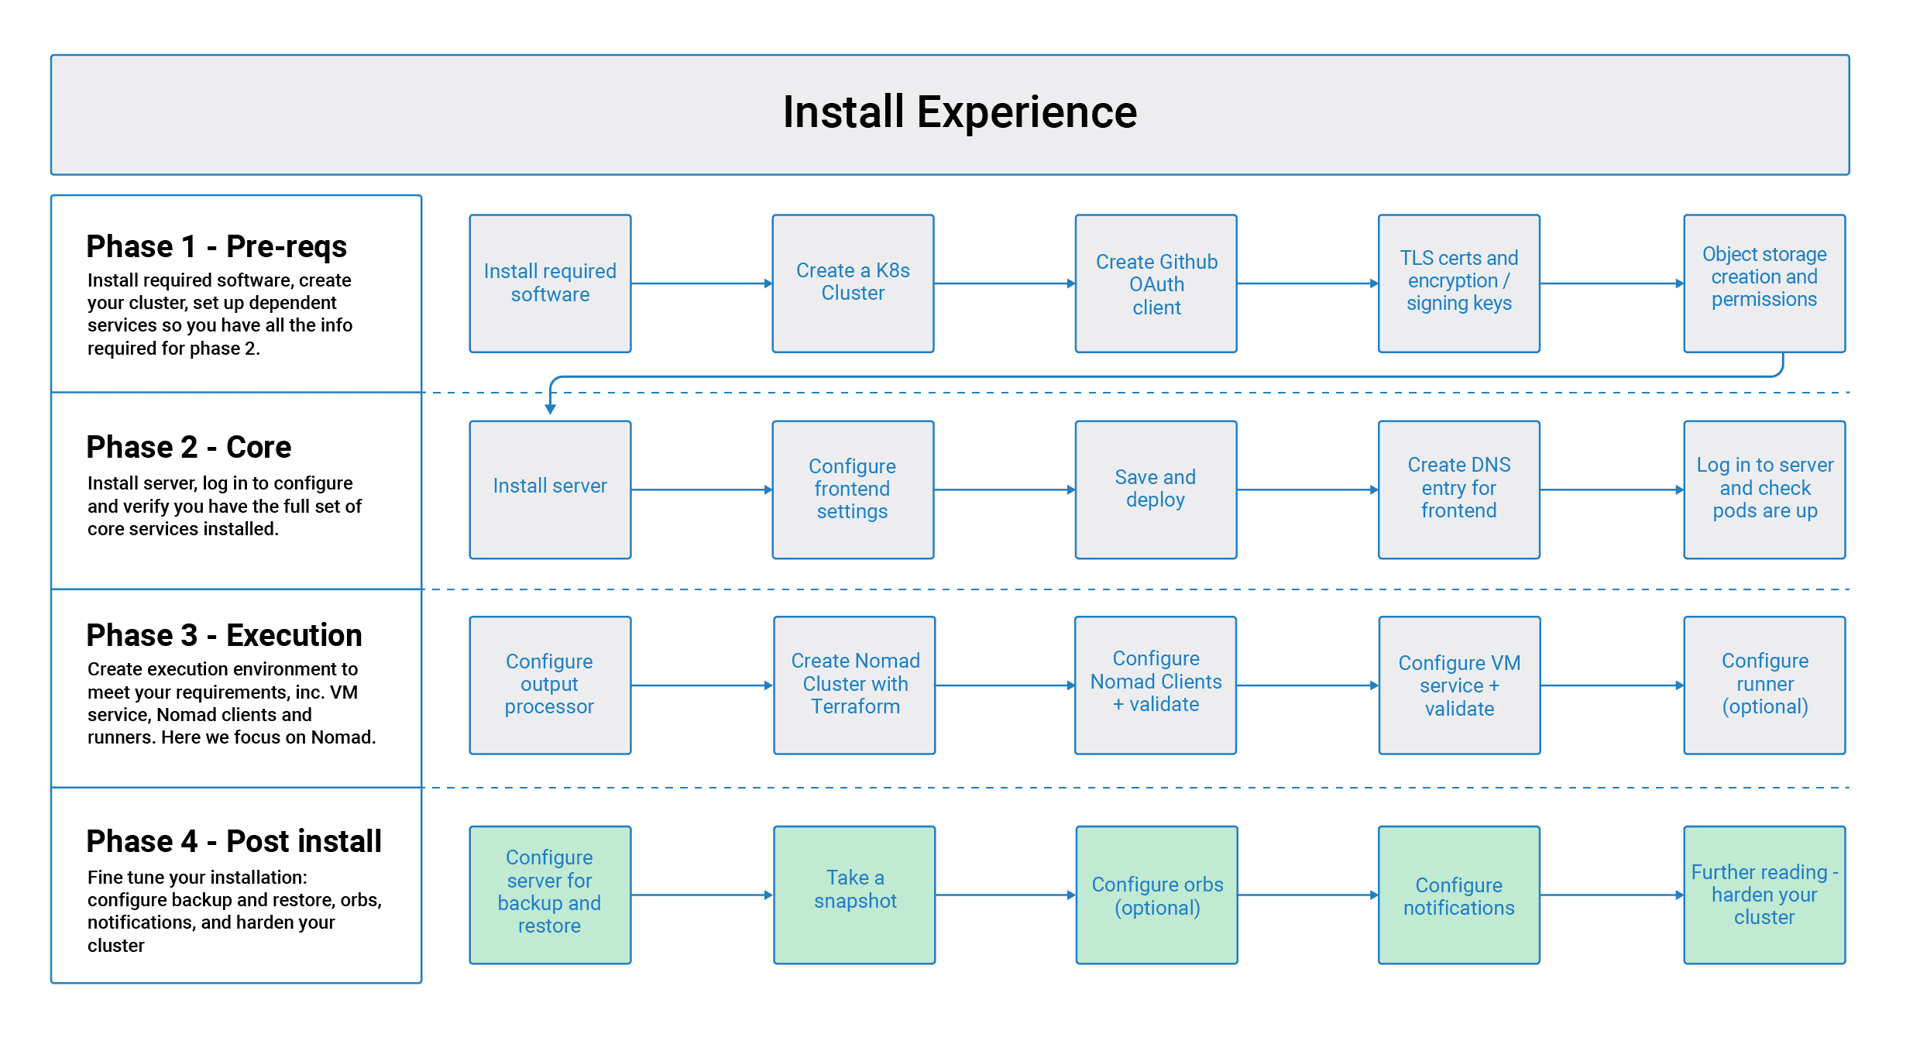
 Before you begin with the CircleCI server v3.x post installation phase, ensure you have run through Phase 1 – Prerequisites, Phase 2 - Core services installation and Phase 3 - Build services installation.

In the following sections, replace any items or credentials displayed between < > with your details. |
Phase 4: Post installation
Set up backup and restore
Server 3.x backups on AWS
These instructions were sourced from the Velero documentation here.
Step 1 - Create an AWS S3 bucket
BUCKET=<YOUR_BUCKET>
REGION=<YOUR_REGION>
aws s3api create-bucket \
    --bucket $BUCKET \
    --region $REGION \
    --create-bucket-configuration LocationConstraint=$REGION
us-east-1 does not support a LocationConstraint. If your region is us-east-1, omit the bucket configuration. |
Step 2 - Set up permissions for Velero
-
Create an IAM user
aws iam create-user --user-name velero-
Attach policies to give user
velerothe necessary permissions:
cat > velero-policy.json <<EOF
{
    "Version": "2012-10-17",
    "Statement": [
        {
            "Effect": "Allow",
            "Action": [
                "ec2:DescribeVolumes",
                "ec2:DescribeSnapshots",
                "ec2:CreateTags",
                "ec2:CreateVolume",
                "ec2:CreateSnapshot",
                "ec2:DeleteSnapshot"
            ],
            "Resource": "*"
        },
        {
            "Effect": "Allow",
            "Action": [
                "s3:GetObject",
                "s3:DeleteObject",
                "s3:PutObject",
                "s3:AbortMultipartUpload",
                "s3:ListMultipartUploadParts"
            ],
            "Resource": [
                "arn:aws:s3:::${BUCKET}/*"
            ]
        },
        {
            "Effect": "Allow",
            "Action": [
                "s3:ListBucket"
            ],
            "Resource": [
                "arn:aws:s3:::${BUCKET}"
            ]
        }
    ]
}
EOF
aws iam put-user-policy \
--user-name velero \
--policy-name velero \
--policy-document file://velero-policy.json-
Create an access key for user
velero
aws iam create-access-key --user-name veleroThe result should look like this:
{
  "AccessKey": {
        "UserName": "velero",
        "Status": "Active",
        "CreateDate": "2017-07-31T22:24:41.576Z",
        "SecretAccessKey": <AWS_SECRET_ACCESS_KEY>,
        "AccessKeyId": <AWS_ACCESS_KEY_ID>
  }
}-
Create a Velero-specific credentials file (for example:
./credentials-velero) in your local directory, with the following contents:
[default]
aws_access_key_id=<AWS_ACCESS_KEY_ID>
aws_secret_access_key=<AWS_SECRET_ACCESS_KEY>
where the AWS_ACCESS_KEY_ID and AWS_SECRET_ACCESS_KEY placeholders are values returned from the create-access-key request in the previous step.
Step 3 - Install and start Velero
-
Run the following
veleroinstallcommand. This creates a namespace calledveleroand installs all the necessary resources to run Velero. Make sure that you pass the correct file name containing the AWS credentials that you created in Step 2.
KOTS backups require restic to operate. When installing Velero, ensure that you have the --use-restic flag set, as shown below: |
velero install \
    --provider aws \
    --plugins velero/velero-plugin-for-aws:v1.2.0 \
    --bucket $BUCKET \
    --backup-location-config region=$REGION \
    --snapshot-location-config region=$REGION \
    --secret-file ./credentials-velero \
    --use-restic \
--wait-
Once Velero is installed on your cluster, check the new
veleronamespace. You should have a Velero deployment and a restic daemonset, for example:
$ kubectl get pods --namespace velero
NAME                      READY   STATUS    RESTARTS   AGE
restic-5vlww              1/1     Running   0          2m
restic-94ptv              1/1     Running   0          2m
restic-ch6m9              1/1     Running   0          2m
restic-mknws              1/1     Running   0          2m
velero-68788b675c-dm2s7   1/1     Running   0          2m
As restic is a daemonset, there should be one pod for each node in your Kubernetes cluster.
Server 3.x backups on GCP
The following steps are specific for Google Cloud Platform and it is assumed you have met the prerequisites.
These instructions were sourced from the documentation for the Velero GCP plugin here.
Step 1 - Create a GCP bucket
To reduce the risk of typos, you can set some of the parameters as shell variables. Should you be unable to complete all the steps in the same session, do not forget to reset variables as necessary before proceeding. In the step below, for example, you can define a variable for your bucket name. Replace the <YOUR_BUCKET> placeholder with the name of the bucket you want to create for your backups.
BUCKET=<YOUR_BUCKET>

gsutil mb gs://$BUCKET/
Step 2 - Setup permissions for Velero
If your server installation runs within a GKE cluster, ensure that your current IAM user is a cluster admin for this cluster, as RBAC objects need to be created. More information can be found in the GKE documentation.
-
First, you will set a shell variable for your project ID. To do so, make sure that your
gcloudCLI points to the correct project by looking at the current configuration:gcloud config list -
If the project is correct, set the variable:
PROJECT_ID=$(gcloud config get-value project) -
Create a service account:
gcloud iam service-accounts create velero \
    --display-name "Velero service account"
If you run several clusters with Velero, consider using a more specific name for the Service Account besides velero, as suggested above. -
You can check if the service account has been created successfully by running the following command:
gcloud iam service-accounts list -
Next, store the email address for the Service Account in a variable:
SERVICE_ACCOUNT_EMAIL=$(gcloud iam service-accounts list \
  --filter="displayName:Velero service account" \
  --format 'value(email)')
Modify the command as needed to match the display name you have chosen for your Service Account.
-
Grant the necessary permissions to the Service Account:
ROLE_PERMISSIONS=(
    compute.disks.get
    compute.disks.create
    compute.disks.createSnapshot
    compute.snapshots.get
    compute.snapshots.create
    compute.snapshots.useReadOnly
    compute.snapshots.delete
    compute.zones.get
)

gcloud iam roles create velero.server \
    --project $PROJECT_ID \
    --title "Velero Server" \
    --permissions "$(IFS=","; echo "${ROLE_PERMISSIONS[*]}")"

gcloud projects add-iam-policy-binding $PROJECT_ID \
    --member serviceAccount:$SERVICE_ACCOUNT_EMAIL \
    --role projects/$PROJECT_ID/roles/velero.server

gsutil iam ch serviceAccount:$SERVICE_ACCOUNT_EMAIL:objectAdmin gs://${BUCKET}
Now you need to ensure that Velero can use this Service Account.
Option 1: JSON key file
You can simply pass a JSON credentials file to Velero to authorize it to perform actions as the Service Account. To do this, you first need to create a key:
gcloud iam service-accounts keys create credentials-velero \
    --iam-account $SERVICE_ACCOUNT_EMAIL
After running this command, you should see a file named credentials-velero in your local working directory.
Option 2: Workload Identities
If you are already using Workload Identities in your cluster, you can bind the GCP Service Account you just created to Velero’s Kubernetes service account. In this case, the GCP Service Account needs the iam.serviceAccounts.signBlob role in addition to the permissions already specified above.
| If you are switching from static JSON credentials to Workload Identity, you should delete the keys from GCP as well as from CircleCI KOTS Admin Console. |
Step 3 - Install and start Velero
-
Run one of the following
veleroinstallcommands, depending on how you authorized the service account. This creates a namespace calledveleroand installs all the necessary resources to run Velero.
KOTS backups require restic to operate. When installing Velero, ensure that you have the --use-restic flag set. |
If using a JSON key file
velero install \
    --provider gcp \
    --plugins velero/velero-plugin-for-gcp:v1.2.0 \
    --bucket $BUCKET \
    --secret-file ./credentials-velero \
    --use-restic \
    --wait
If using Workload Identities
velero install \
    --provider gcp \
    --plugins velero/velero-plugin-for-gcp:v1.2.0 \
    --bucket $BUCKET \
    --no-secret \
    --sa-annotations iam.gke.io/gcp-service-account=$SERVICE_ACCOUNT_EMAIL \
    --backup-location-config serviceAccount=$SERVICE_ACCOUNT_EMAIL \
    --use-restic \
    --wait
For more options on customizing your installation, refer to the Velero documentation.
-
Once Velero is installed on your cluster, check the new
veleronamespace. You should have a Velero deployment and a restic daemonset, for example:
$ kubectl get pods --namespace velero
NAME                      READY   STATUS    RESTARTS   AGE
restic-5vlww              1/1     Running   0          2m
restic-94ptv              1/1     Running   0          2m
restic-ch6m9              1/1     Running   0          2m
restic-mknws              1/1     Running   0          2m
velero-68788b675c-dm2s7   1/1     Running   0          2m
As restic is a daemonset, there should be one pod for each node in your Kubernetes cluster.
Server 3.x backups with S3 Compatible Storage
The following steps assume you are using S3-compatible object storage, but not necessarily AWS S3, for your backups. It is also assumed you have met the prerequisites.
These instructions were sourced from the Velero documentation here.
Step 1 - Configure mc client
To start, configure mc to connect to your storage provider:
# Alias can be any name as long as you use the same value in subsequent commands
export ALIAS=my-provider
mc alias set $ALIAS <YOUR_MINIO_ENDPOINT> <YOUR_MINIO_ACCESS_KEY_ID> <YOUR_MINIO_SECRET_ACCESS_KEY>
You can verify your client is correctly configured by running mc ls my-provider and you should see the buckets in your provider enumerated in the output.
Step 2 - Create a bucket
Create a bucket for your backups. It is important that a new bucket is used, as Velero cannot use a preexisting bucket that contains other content.
mc mb ${ALIAS}/<YOUR_BUCKET>Step 3 - Create a user and policy
Next, create a user and policy for Velero to access your bucket.
In the following snippet <YOUR_MINIO_ACCESS_KEY_ID> and <YOUR_MINIO_SECRET_ACCESS_KEY> refer to the credentials used by Velero to access MinIO. |
# Create user
mc admin user add $ALIAS <YOUR_MINIO_ACCESS_KEY_ID> <YOUR_MINIO_SECRET_ACCESS_KEY>

# Create policy
cat > velero-policy.json << EOF
{
  "Version": "2012-10-17",
  "Statement": [
    {
      "Effect": "Allow",
      "Action": [
        "s3:*"
      ],
      "Resource": [
        "arn:aws:s3:::<YOUR_BUCKET>",
        "arn:aws:s3:::<YOUR_BUCKET>/*"
      ]
    }
  ]
}
EOF

mc admin policy add $ALIAS velero-policy velero-policy.json

# Bind user to policy
mc admin policy set $ALIAS velero-policy user=<YOUR_VELERO_ACCESS_KEY_ID>
Finally, you add your new user’s credentials to a file (./credentials-velero in this example) with the following contents:
[default]
aws_access_key_id=<YOUR_VELERO_ACCESS_KEY_ID>
aws_secret_access_key=<YOUR_VELERO_SECRET_ACCESS_KEY>
Step 4 - Install and start Velero
Run the following velero install command. This creates a namespace called velero and installs all the necessary resources to run Velero.
KOTS backups require restic to operate. When installing Velero, ensure that you have the --use-restic flag set, as shown below: |
velero install --provider aws \
  --plugins velero/velero-plugin-for-aws:v1.2.0 \
  --bucket <YOUR_BUCKET> \
  --secret-file ./credentials-velero \
  --use-volume-snapshots=false \
  --use-restic \
  --backup-location-config region=minio,s3ForcePathStyle="true",s3Url=<YOUR_ENDPOINT> \
  --wait
Once Velero is installed on your cluster, check the new velero namespace. You should have a Velero deployment and a restic daemonset, for example:
$ kubectl get pods --namespace velero
NAME                      READY   STATUS    RESTARTS   AGE
restic-5vlww              1/1     Running   0          2m
restic-94ptv              1/1     Running   0          2m
restic-ch6m9              1/1     Running   0          2m
restic-mknws              1/1     Running   0          2m
velero-68788b675c-dm2s7   1/1     Running   0          2m
As restic is a daemonset, there should be one pod for each node in your Kubernetes cluster.
Creating backups
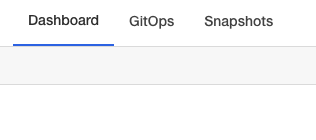
Now that Velero is installed on your cluster, you should see the snapshots option in the navbar of the management console.

If you see this option, you are ready to create your first backup. If you do not see this option, please refer to the troubleshooting section.
Option 1 - Create a backup with KOTS CLI
To create the backup, run the following command:
kubectl kots backup --namespace <your namespace>Option 2 - Create a backup with KOTS Admin Console
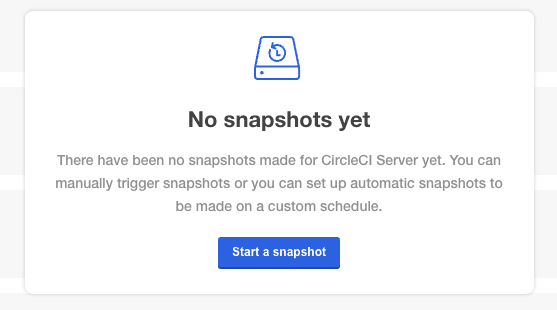
Select Snapshots from the navbar. The default selection should be Full Snapshots, which is recommended.

Click the Start a snapshot button.

Orbs
Server installations include their own local orb registry. This registry is private to the server installation. All orbs referenced in project configs reference the orbs in the server orb registry. You are responsible for maintaining orbs. This includes:
-
Copying orbs from the public registry.
-
Updating orbs that may have been copied previously.
-
Registering your company’s private orbs, if you have any.
For more information and steps to complete these tasks, see the Orbs on Server guide.
Email Notifications
Build notifications are sent by email. This section has details on how to set up build notifications by email.
Access the KOTS admin console. Get to the KOTS admin console by running the following, substituting your namespace:
kubectl kots admin-console -n <YOUR_CIRCLECI_NAMESPACE>Locate the Email Notifications section in Settings and fill in the following details to configure email notifications for your installation.
Locate the Email Notifications section in Settings and fill in the following details to configure email notifications for your installation:
-
Email Submission server hostname (required) - Host name of the submission server (for example, for Sendgrid use smtp.sendgrid.net).
-
Username (required) - Username to authenticate to submission server. This is commonly the same as the user’s email address.
-
Password (required) - Password to authenticate to submission server.
-
Port (optional) - Port of the submission server. This is usually either 25 or 587. While port 465 is also commonly used for email submission, it is often used with implicit TLS instead of StartTLS. Server only supports StartTLS for encrypted submission.
Outbound connections on port 25 are blocked on most cloud providers. Should you select this port, be aware that your notifications may fail to send. -
Enable StartTLS - Enabling this will encrypt mail submission.
StartTLS is used to encrypt mail by default, and you should only disable this if you can otherwise guarantee the confidentiality of traffic. -
Email from address (required) - The from address for the email.
Click the Save config button to update your installation and redeploy server.
What to read next
Help make this document better
This guide, as well as the rest of our docs, are open source and available on GitHub. We welcome your contributions.
- Suggest an edit to this page (please read the contributing guide first).
- To report a problem in the documentation, or to submit feedback and comments, please open an issue on GitHub.
- CircleCI is always seeking ways to improve your experience with our platform. If you would like to share feedback, please join our research community.
Need support?
Our support engineers are available to help with service issues, billing, or account related questions, and can help troubleshoot build configurations. Contact our support engineers by opening a ticket.
You can also visit our support site to find support articles, community forums, and training resources.

CircleCI Documentation by CircleCI is licensed under a Creative Commons Attribution-NonCommercial-ShareAlike 4.0 International License.


